Steps for building a simple mobile application using Expo SDK, Expo Router, and MongoDB Realm in React Native and plain Javascript.
Realm is a fast, scalable alternative to SQLite with mobile-to-cloud data sync that makes building real-time, reactive mobile apps easy.
I did this tutorial for those who want to build in javascript and not typescript but also to show my approach to using Realm with Expo Router's file-based approach to routing.
This is a companion blog post to go along with this video.
Getting Started
Create the application
npx create-expo-app@latest --template blank@sdk-49 app-with-realm
change into project directory
cd app-with-realm
Install additional libraries and packages for expo-router
npx expo install expo-router@latest react-native-safe-area-context react-native-screens expo-linking expo-constants expo-status-bar react-native-gesture-handler
Make modifications to support expo-router in package.json
{
  "main": "expo-router/entry"
}
Not using web so skipping that part of documentation, but add the scheme app.json
"scheme": "app-with-realm",
update babel.config.js to include the new plugin.
module.exports = function (api) {
  api.cache(true);
  return {
    presets: ['babel-preset-expo'],
    plugins: ['expo-router/babel'],
  };
};
Lets add the index page and then test it is working, remember the files all live in a new app directory that you have to create. /app/index.js
// /app/index.js

import { Text } from 'react-native';

export default function Page() {
  return <Text>Home page</Text>;
}
####Installing Realm
npm install realm @realm/react
to build locally run do the following, if not you will continue to get a pod install error
Error: Missing Realm constructor. Did you run "pod install"? Please see realm.io/docs/react-native/latest/#missing-.. for troubleshooting*
npx expo prebuild
then to run on ios, you will see the pod file get installed appropriately
npm run ios
Now we need to create our schema will be using the one from the realm example but in plain javascript. Add file to app directory
// app/Task.js

import Realm, { BSON } from "realm";

export class Task extends Realm.Object {
  _id
  description
  isComplete
  createdAt

  static primaryKey = "_id";
  static schema = {
    name: "Task",
    primaryKey: "_id",
    properties: {
      _id: 'uuid',
      description: "string",
      createdAt: {
        type: "date",
        default: new Date(),
      },
      isComplete: {
        type: "bool",
        default: false,
        indexed: true,
      },
    },
  };

  constructor(realm, description) {
    console.log("in constructor");
    super(realm, {
      _id: new BSON.UUID(),
      description,
    });
  }
}
Now lets wrap our whole app with the provider by creating a layout at the app route. Add this file _layout.js to the root of you app directory.
We use the schema we created Task as a parameter to the RealmProvider
// app/_layout.js

import 'react-native-get-random-values'
import { Stack} from "expo-router";
import { RealmProvider } from "@realm/react";
import { Task } from './Task';

export default function AppLayout() {

  return (
    <RealmProvider schema={[Task]}>
      <Stack />
    </RealmProvider>
  );
}
update index.js so that we can query our database using a useQuery hook provided by realm.
// /app/index.js

import { Text, View } from "react-native";
import { useQuery } from "@realm/react";
import { Task } from "./Task";

export default function Page() {
  const tasks = useQuery(Task);
  console.log(tasks);
  return (
    <View>
      <Text>TASK LIST</Text>
      <Text>{JSON.stringify(tasks, null, 2)}</Text>
    </View>
  );
}
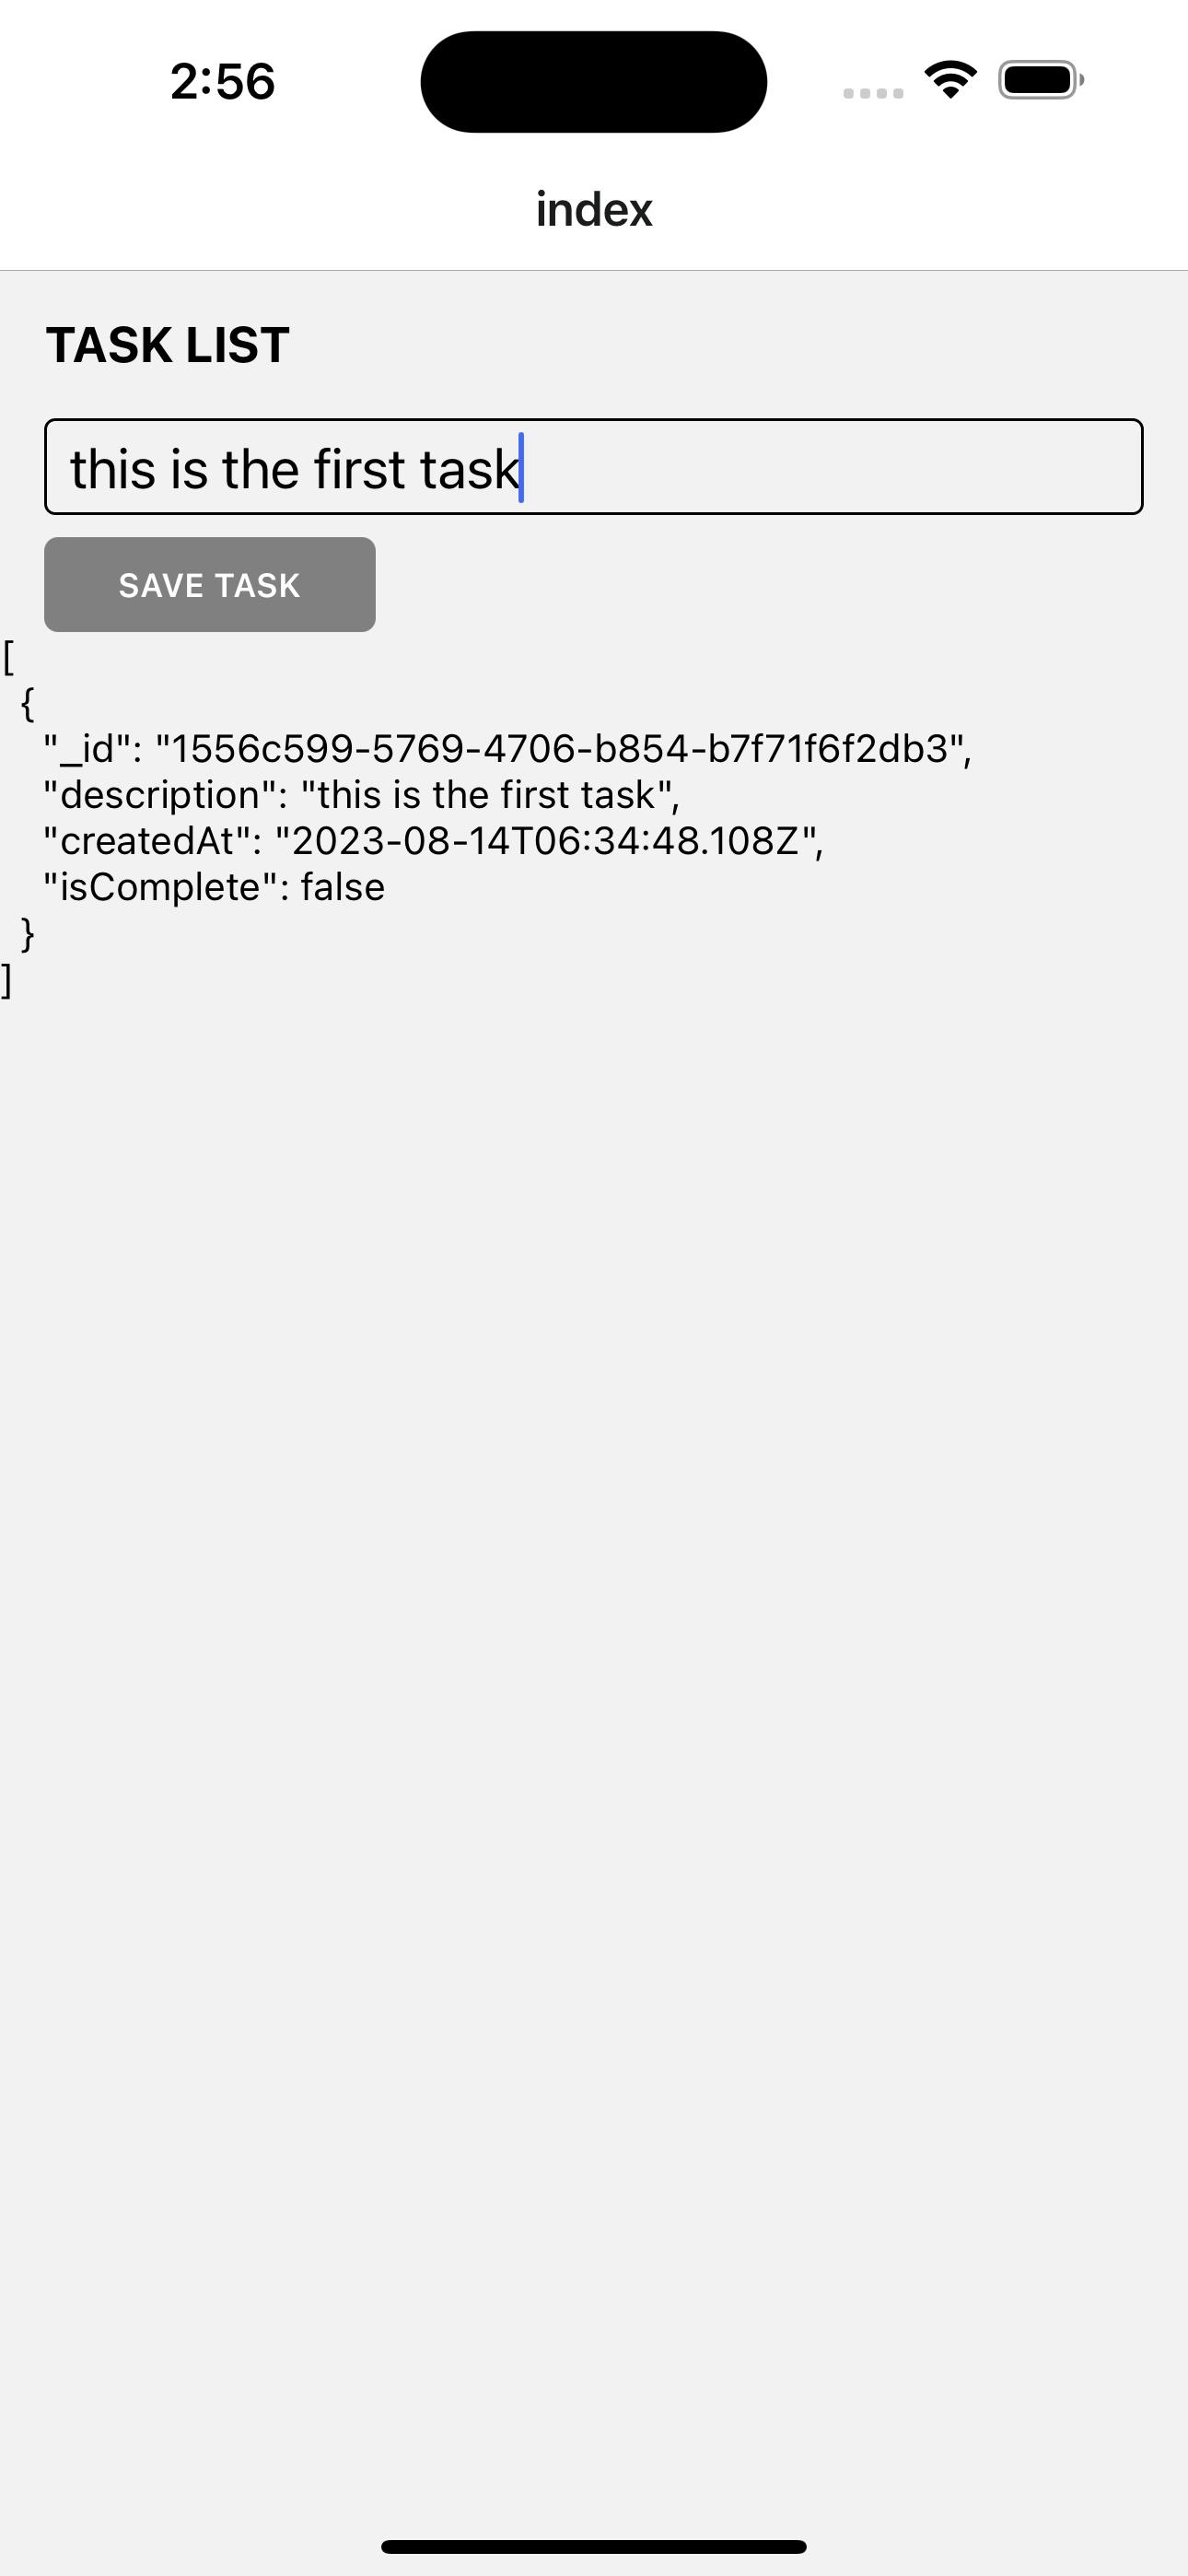
lets add some UI to add a Task
// /app/index.js

import {
  Text,
  TextInput,
  View,
  StyleSheet,
  TouchableOpacity,
} from "react-native";
import { useQuery } from "@realm/react";
import { Task } from "./Task";
import { useRef } from "react";

export default function Page() {
  // ref to hold description
  const descriptionRef = useRef("");

  // get the tasks
  const tasks = useQuery(Task);

  return (
    <View style={{ height: Dimensions.get("screen").height - 132 }}>
      <Text style={styles.title}>TASK LIST</Text>
      {/* input for description */}
      <TextInput
        placeholder="Enter New Task"
        autoCapitalize="none"
        nativeID="description"
        multiline={true}
        numberOfLines={8}
        value={descriptionRef.current}
        onChangeText={(text) => {
          descriptionRef.current = text;
        }}
        style={styles.textInput}
      />
      {/*  button to save the new task */}
      <TouchableOpacity
        style={styles.button}
        onPress={() => {
          createNewTask();
        }}
      >
        <Text style={styles.buttonText}>SAVE TASK</Text>
      </TouchableOpacity>
      <Text>{JSON.stringify(tasks, null, 2)}</Text>
    </View>
  );
}

const styles = StyleSheet.create({
  container: {
    margin: 16,
  },
  title: {
    fontSize: 18,
    margin: 16,
    fontWeight: "700",
  },
  label: {
    marginBottom: 8,
    fontSize: 18,
    fontWeight: "500",
    // color: "#455fff",
  },
  textInput: {
    fontSize: 20,
    borderWidth: 1,
    borderRadius: 4,
    // borderColor: "#455fff",
    paddingHorizontal: 8,
    paddingVertical: 4,
    marginBottom: 0,
    marginHorizontal: 16,
  },
  button: {
    backgroundColor: "grey",
    padding: 10,
    borderRadius: 5,
    marginTop: 8,
    marginLeft: 16,
    width: 120,
  },
  buttonText: {
    color: "white",
    textAlign: "center",
    fontWeight: "600",
    fontSize: 12,
  },
});
Now add the function, createNewTask
to save the task to the realm database. We will us the useRealm hook in this function
import { useRealm } from "@realm/react";
then inside the component
const realm = useRealm();
Then in the component add the code for the createNewTask function
const createNewTask = () => {
  realm.write(() => {
     const newTask = new Task(realm, descriptionRef.current);

     // clear input field
         descriptionRef.current = "";

     // return task
     return newTask;
  });
};
Run the code and add a task

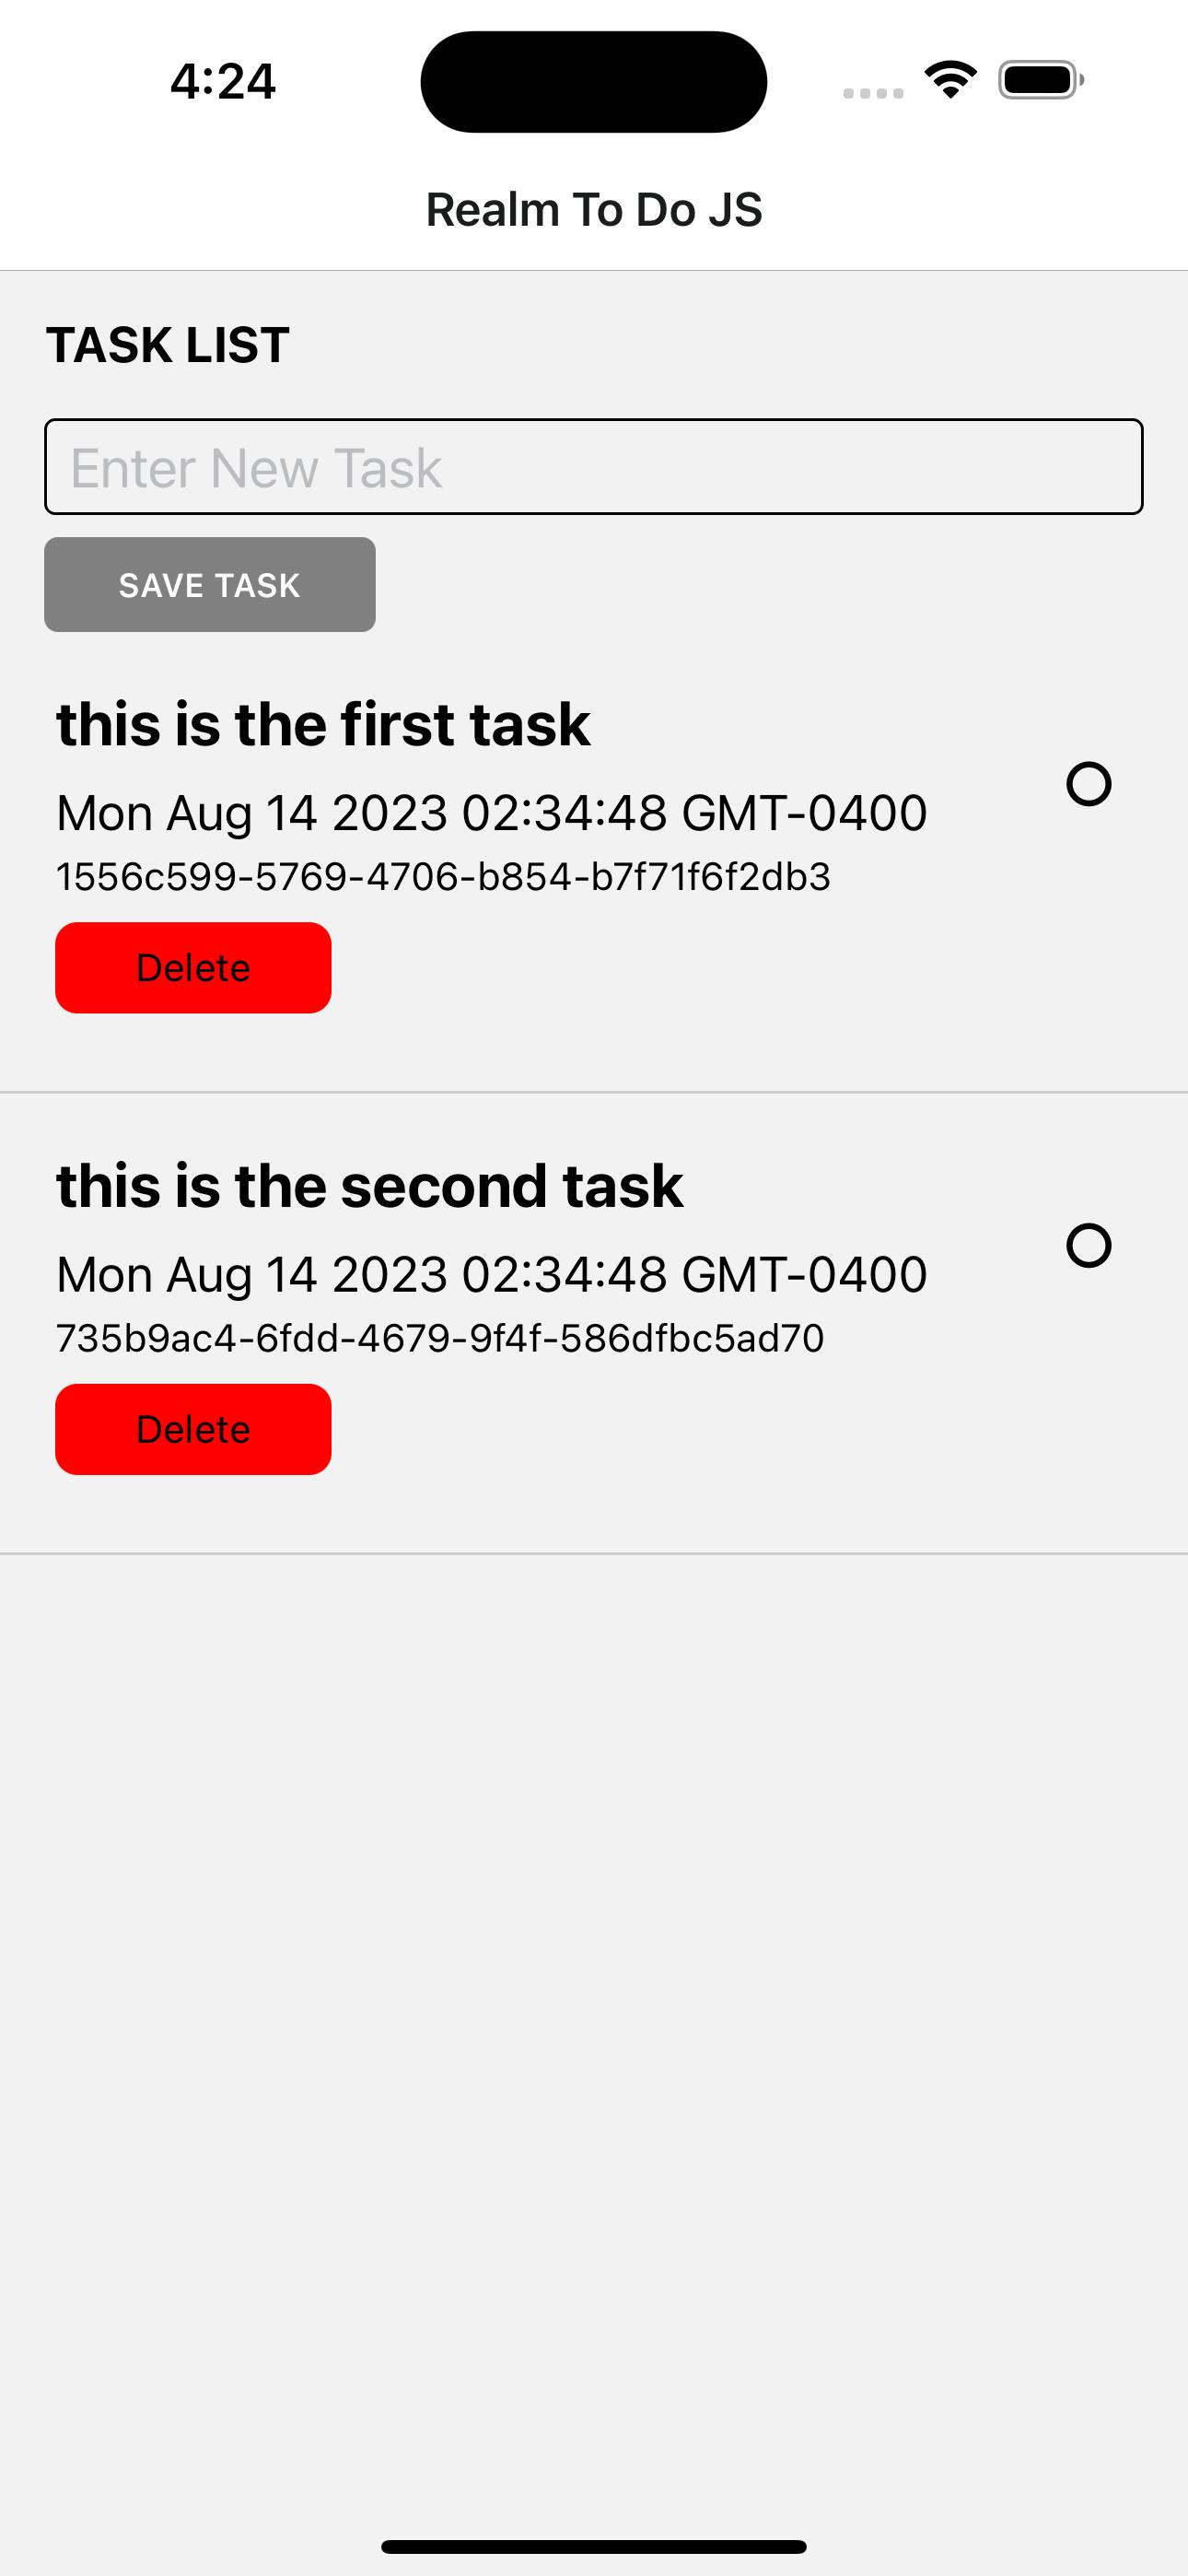
Lets add a component to render the tasks in a FlatList
import { useRealm } from "@realm/react";
import { StyleSheet, View, Text, Dimensions, Pressable } from "react-native";
import { FlatList } from "react-native-gesture-handler";

export const TaskList = ({ data }) => {
  const realm = useRealm();

  const renderItem = ({ item }) => (
    <View style={styles.row}>
      <View style={styles.item}>
        <View style={{ display: "flex", flex: 12 }}>

          <Text style={{ fontSize: 22, fontWeight: 'bold', marginBottom:8 }}>{item.description}</Text>
          <Text style={{ fontSize: 18, marginBottom:4 }}>{item.createdAt.toString()}</Text>
          <Text style={{ }}>{item._id + ""}</Text>
        </View>
        <View style={{ display: "flex", alignSelf: "center" }}>
          <Pressable
            onPress={() => onToggleStatus(item)}
            style={[styles.status, item.isComplete && styles.completed]}
          >
            <Text style={[styles.icon]}>{item.isComplete ? "✓" : "○"}</Text>
          </Pressable>
        </View>
      </View>
      <Pressable onPress={()=>onDelete(item)} style={styles.deleteButton}>
        <Text style={styles.deleteText}>Delete</Text>
      </Pressable>
    </View>
  );

  return (
    <FlatList
      data={data}
      renderItem={renderItem}
      keyExtractor={(item) => item._id + ""}
    />
  );
};

const styles = StyleSheet.create({
  item: {
    display: "flex",
    flexDirection: "row",
  },
  row: {
    padding: 20,
    borderBottomWidth: 1,
    borderBottomColor: "#ccc",
    width: Dimensions.get("screen").width,
  },
  icon: {
    textAlign: "center",
    fontSize: 20,
    fontWeight: "bold",
    textAlignVertical: "center",
  },
  status: {
    width: 32,
    height: 32,
  },
  deleteButton: {
    backgroundColor: "red",
    margin: 8,
    marginLeft: 0,
    paddingHorizontal: 16,
    paddingVertical: 8,
    borderRadius: 8,
    width: 100,
  },
  deleteText: {
    textAlign: "center",
  },
});
Add Toggle function
const onToggleStatus = (task) => {
  console.log(task);
  realm.write(() => {
    task.isComplete = !task.isComplete;
  });
};
Add delete Function
const onDelete = (task) => {
  console.log(task);
  realm.write(() => {
    realm.delete(task);
  });
};

Links
Realm Database - https://realm.io/
Realm React-Native - https://www.mongodb.com/docs/realm/sdk/react-native/install/
Expo Router Doc - https://docs.expo.dev/routing/introduction/
Social Media
Twitter - https://twitter.com/aaronksaunders
Instagram - https://www.instagram.com/aaronksaunders/
