How To Use Storybook with Ionic and Angular

🎓 Udemy Courses - https://www.udemy.com/user/aaronsaunders/ 🎓 Gumroad Courses/Content - https://www.gumroad.com/fiwic
Storybook is an open source tool for developing UI components in isolation for React, Vue, Angular, and more. It makes building stunning UIs organized and efficient.
Overview
Introduction to setting up a using Storybookjs in an Ionic Framework Angular Project.
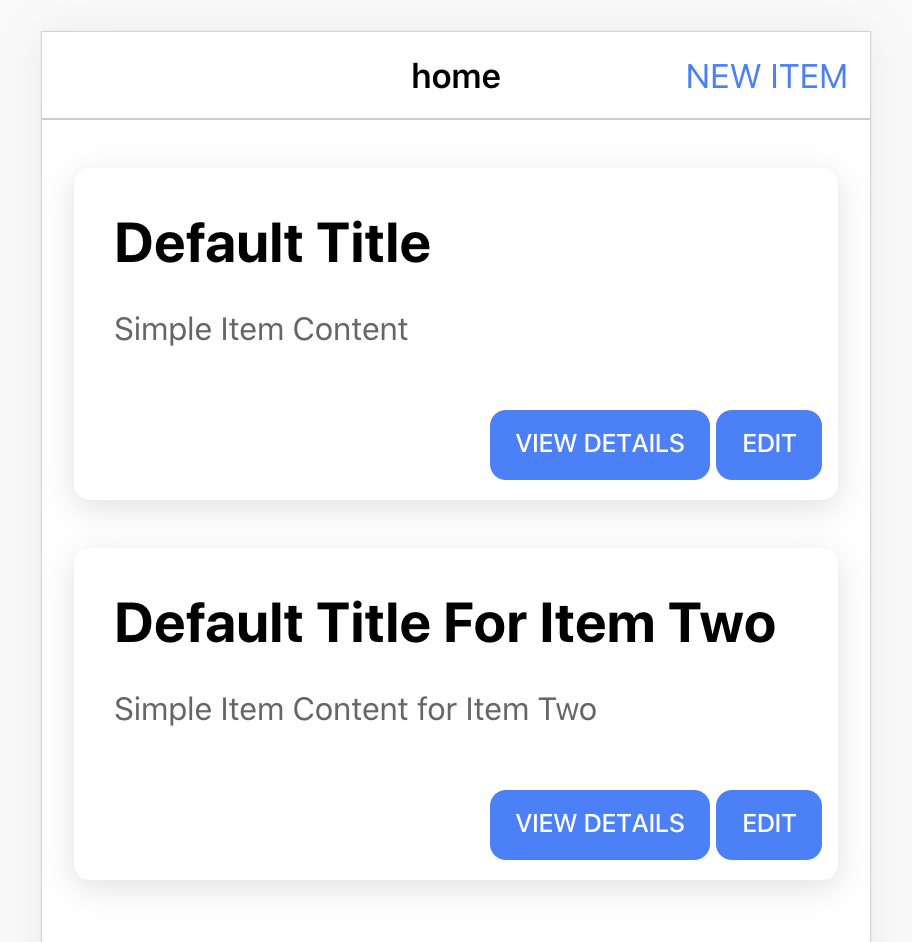
We will create a simple ionic card component that displays content passed in as a parameter and emits custom events for clicking on a button associated with viewing details and another button and custom event for editing.
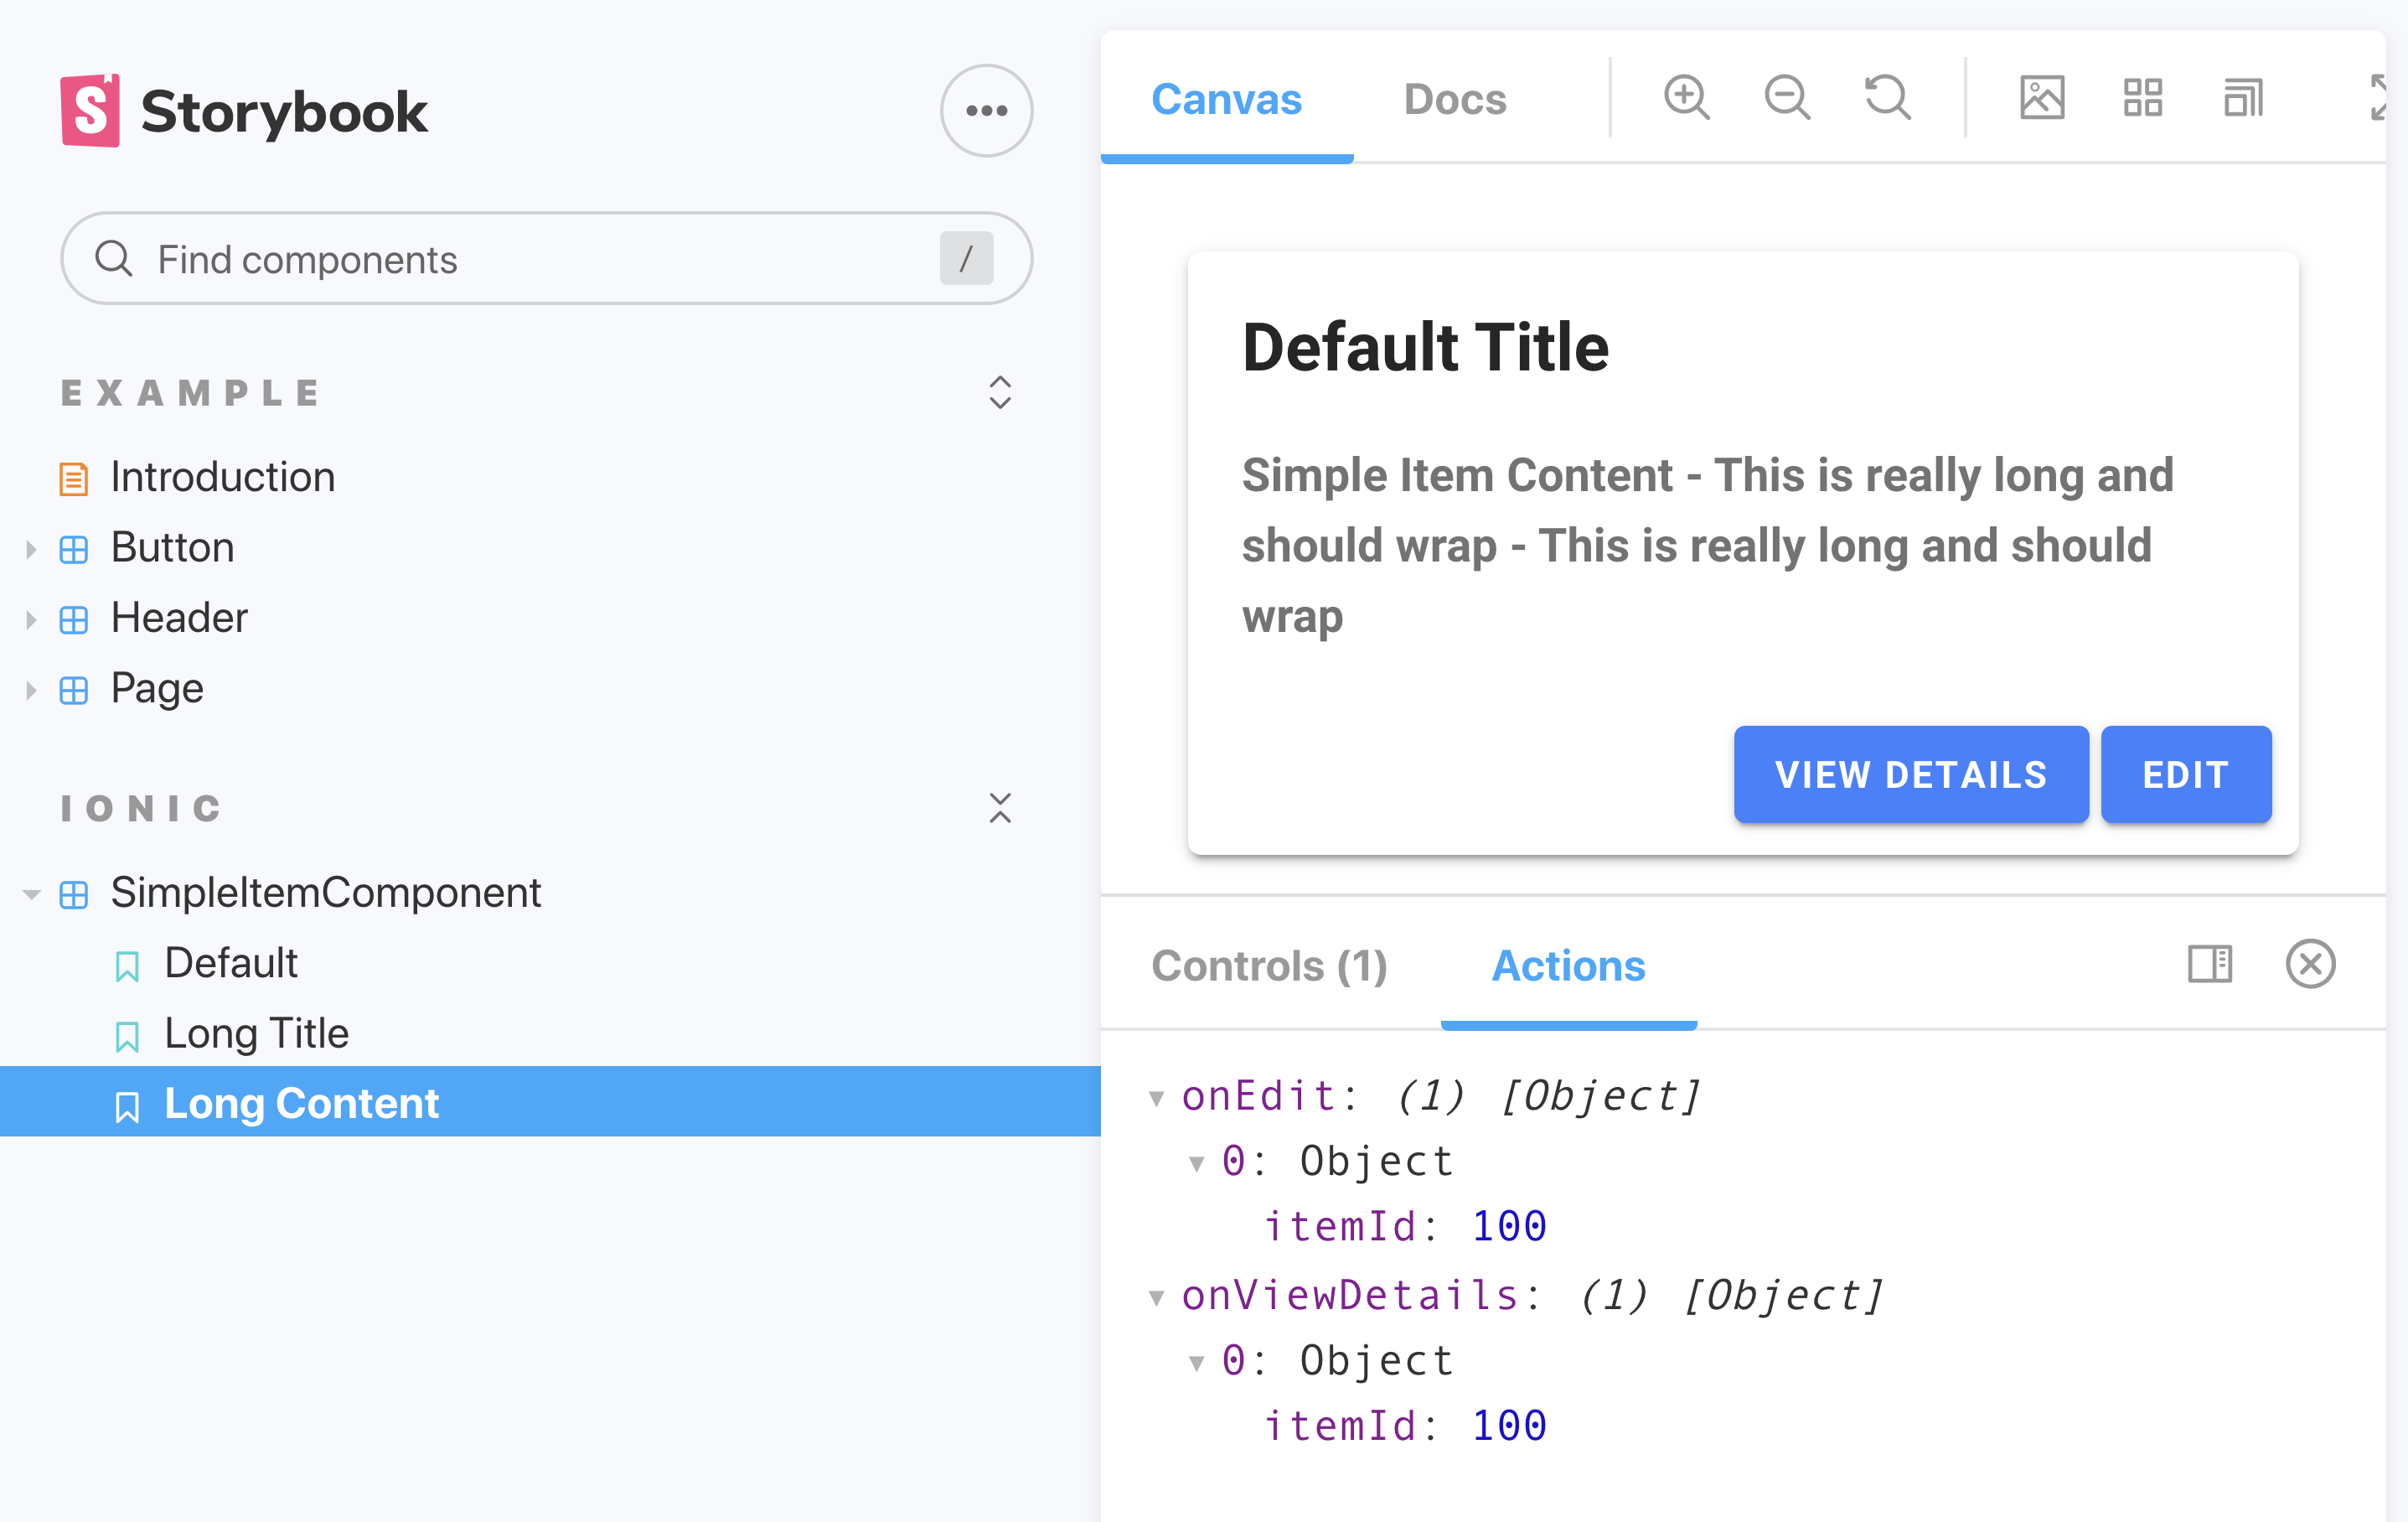
We show how to uses actions as an add-on in the storybook story. We use the decorators add-on to included the angular modules required for Ionic Framework to function properly with Storybook.
After the story is working, we integrate the component into the main application
See links for Ionic VueJS and Ionic ReactJS
Source Code
// SimpleItem.stories.ts
import { IonicModule } from '@ionic/angular';
import { moduleMetadata } from '@storybook/angular';
// also exported from '@storybook/angular' if you can deal with breaking changes in 6.1
import { Story, Meta } from '@storybook/angular/types-6-0';
import { SimpleItemComponent } from 'src/app/home/simple-item/simple-item.component';
import { action } from '@storybook/addon-actions';

export default {
  title: 'Ionic/SimpleItemComponent',
  component: SimpleItemComponent,
  argTypes: {},
  decorators: [
    moduleMetadata({
      declarations: [SimpleItemComponent],
      imports: [IonicModule.forRoot()],
    }),
  ],
} as Meta;

const Template: Story<SimpleItemComponent> = (args: SimpleItemComponent) => ({
  component: SimpleItemComponent,
  props: {
    ...args,
    onViewDetails: action('onViewDetails'),
    onEdit: action('onEdit'),
  },
  template: `
  <app-simple-item
     [item]="item"
     (onViewDetails)="onViewDetails($event)"
     (onEdit)="onEdit($event)" >
  </app-simple-item>`,
});

export const Default = Template.bind({});
Default.args = {
  item: {
    id: 100,
    title: 'Default Title',
    content: 'Simple Item Content',
  },
};

export const LongTitle = Template.bind({});
LongTitle.args = {
  item: {
    id: 100,
    title: 'Default Title - This is really long and should wrap',
    content: 'Simple Item Content',
  },
};

export const LongContent = Template.bind({});
LongContent.args = {
  item: {
    id: 100,
    title: 'Default Title',
    content:
      'Simple Item Content  - This is really long and should wrap - This is really long and should wrap',
  },
};
import { Component, Input, OnInit, EventEmitter, Output } from '@angular/core';

@Component({
  selector: 'app-simple-item',
  // templateUrl: './simple-item.component.html',
  styleUrls: ['./simple-item.component.scss'],
  template:
  `
  <ion-card>
    <ion-card-header>
      <ion-card-title>{{ item.title }}</ion-card-title>
    </ion-card-header>
    <ion-card-content>{{ item.content }}</ion-card-content>
    <div class="ion-float-right" style="margin: 8px; zoom: 0.8;">
      <ion-button (click)="clickedViewDetails(item.id)">VIEW DETAILS</ion-button>
      <ion-button (click)="clickedEdit(item.id)">EDIT</ion-button>
    </div>
  </ion-card>
  `
})
export class SimpleItemComponent implements OnInit {
  @Input() item: any;

  @Output()
  onViewDetails = new EventEmitter<any>();

  @Output()
  onEdit = new EventEmitter<any>();

  constructor() {}

  clickedViewDetails() {
    this.onViewDetails.emit({ itemId: this.item.id });
  }

  clickedEdit() {
    this.onEdit.emit({ itemId: this.item.id });
  }

  ngOnInit() {}
}
Video
Links
- Twitter - https://twitter.com/aaronksaunders
- Facebook - https://www.facebook.com/ClearlyInnovativeInc
- Instagram - https://www.instagram.com/aaronksaunders/
- Dev.to - https://dev.to/aaronksaunders
- 🌐 www.fiwic.com


